Tips for Making Transparent Resin 3D Prints

Being able to make clear resin prints opens a lot of design possibilities for containers, miniatures, vases, or models. However, making something that came out of a 3D printer completely transparent is a lot easier said than done.
Making any 3D print completely transparent often takes lots of extra work, whether you’re 3D printing with resin or filament. Resin prints are particularly difficult as resin tends to get cloudy or dull when they are cured with UV light. Unfortunately, curing is also an essential part of the process. How can you possibly work around this process to create transparent resin prints?
UV curing and its effects on transparency
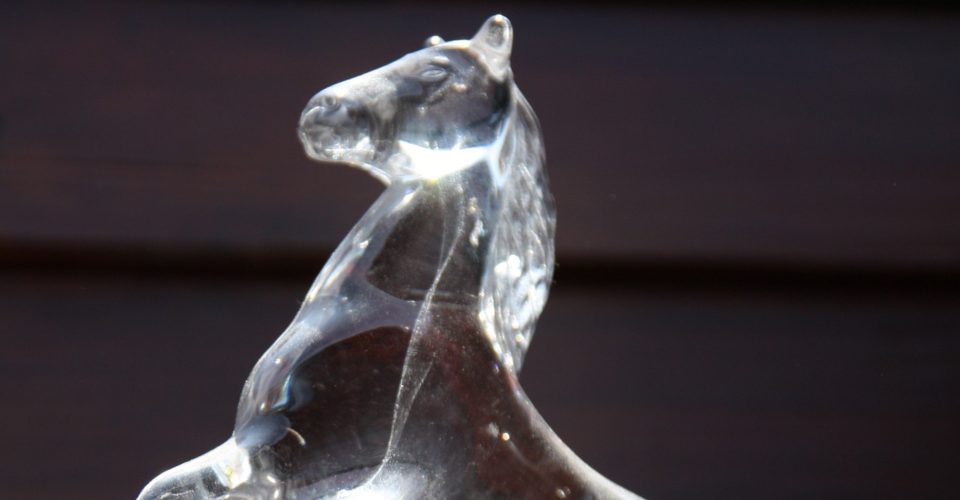
You might buy a crystal clear resin and think that making clear prints from them should be simple. You might even think that you are successful right after the 3D printing step. At this stage, a freshly made resin print can seem glossy with nice transparency.
As you will find out soon enough, this is all false confidence. Once you start cleaning those prints with isopropyl alcohol and taking them through the post-curing step, you will find that the prints start to become cloudy, perhaps even yellowish. You might even observe that the transparency of the resin suffers the more post-processing you do.
The “yellowing” of the resin is a natural consequence of the UV curing process. This is probably something that you have observed before if you had white plastic furniture that was constantly exposed to sunlight. This yellowing effect also affects how the resin interacts with light passing through the object.
The approach to making clear resin prints is two-fold. You must treat the surface of the print to make it as even and smooth as possible, reducing the interaction of light with surface imperfections. There must also be great care taken to prevent over-curing the print.
Which resin should you print with?
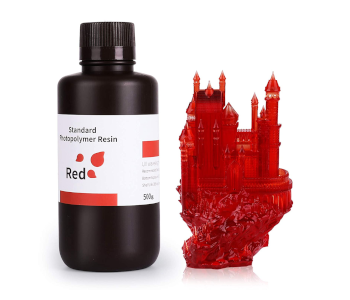
No matter which technique you use, you should always start with a good clear resin. The ANYCUBIC Clear Resin is one of the most popular options for this specific application. There are also some options that have colors, such as the ELEGOO Clear Red and the ELEGOO Clear Blue.
If you want your clear resin prints to have colors, an alternative is to use neutral clear resin and add a few drops of ink into your resin vat. This can be quite troublesome as you might have to empty and refill the resin vat more often, but you have some degree of control over the colors and hues of the finished products.
Method 1 – Sanding and Polishing
The simplest method is to simply sand and polish a finished resin print. This has to be done after the resin print has been through the cleaning and post-curing steps. This technique is quite basic and self-explanatory. The goal is to sand and polish the surface of the resin print to remove microscopic surface imperfections that may affect its optical properties.
To do the proper sanding process, you will need a complete set of sandpaper with different grit numbers. Start with the coarsest grit and move progressively to the finer grit options. Once you’re sanding with 1000-grit sandpaper, you may have to use the wet sanding method for more consistent results. Continue until you have sanded the resin print at 3000-grit.
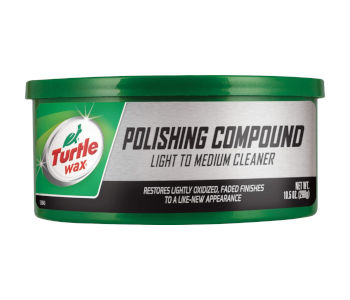
The next step would be to apply some polishing compound (the basic Turtle Wax polishing compound will do) and buff the surface with a clean piece of cloth. The polishing compound will fill in any microscopic spaces on the surface of the print. Repeat this step as many times as needed until you are satisfied with the results.
Remember to wear some breathing protection when you are sanding resin. Sanding releases lots of microscopic plastic particles that you do want to end up in your lungs.
The caveat of this technique is that it is really only applicable for resin prints with basic shapes and without any fine details. Vases, containers, and models with large blocky surfaces are ideal candidates. However, if you’re working with miniatures, then sanding and polishing are impractical and it’s almost impossible to get good results.
Method 2 – Spray-on Resin
The second method involves cleaning the resin print after printing, letting it dry, and spraying a fine coat of uncured resin on it. The purpose of this method is that a very thin application of resin will fill in any surface imperfections of the resin print, improving its overall optical properties.
To start, clean the finished resin print in isopropyl alcohol as you would normally. You will then want to dab the print dry with some paper towels to remove any excess resin. Allow the alcohol to dry completely before applying the first resin coat.
Using a spray bottle, apply a thin and even coat of resin to your print. Make sure to also get into any small spaces and to have all sides covered. You will then want to dry this coat completely, ideally with a fan. This can take an hour or two, but it pays to be patient.
When the first coat is dry, you can repeat the whole spraying step to create the second coat. Most people get good results with two or three coats. You should see substantial improvement in the transparency of the print with each successive application.
After drying the final coat, the resin print can be cured under UV lights. Take note that you’re still using resin for coating, so there is still a risk of over-curing. Make sure to keep the curing time to within 30 minutes only.
Do not forget to wear breathing protection and eye protection when spray coating with resin. As you should know by now, uncured resin is highly toxic. It’s also best to work in an environment with minimal dust. Some of the resin will inevitably get into your skin and clothes, so it’s best to get a shower and change your clothes after doing this step.
Additional Step – Add a clear coat
This step can help make a resin print transparent, regardless of how much work you’ve already done so far. If you’re still not satisfied with the results from either sanding or spray coating, then you can still improve the optical properties at this point.
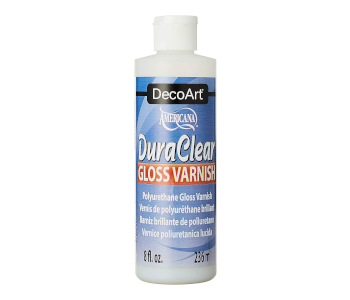
You will want to get a clear coat or gloss varnish. We recommend the Gloss Varnish from The Army Painter brand. Gloss varnish made for models and other crafts can also be used, such as the Vallejo Gloss Varnish and the DecoArt DuraClear Gloss Varnish.
Using a small paintbrush, apply a thin coat of gloss varnish to the pain of the resin print. You need to spread the varnish thin and make sure that it gets into all those small spaces and fine details. The varnish will improve the transparency of the print by filling in the small imperfections and giving the print a nice and glossy finish.
Allow the first coat to dry after application. Gloss varnish can be applied in two or three coats, or until you are satisfied with the appearance. After the application of the clear coat, colored paints can still be applied to the resin print if desired.
Final thoughts
Working with resin has its unique challenges if you’re aiming for transparent prints, but the results are amazing if done right. Resin prints can be so much more transparent when compared to filament prints. This is likely on account of the much smaller layer lines possible through resin printing.
We have presented three methods for improving the transparency of a resin print. Any combination of these methods will also work. Combining all three might even yield the best results. As many who have tried to make clear resin prints have found out, the method that works best is usually the one that requires the most work.