10 Best Ideas for Upgrading Your 3D Printer
Almost every aspect of 3D printing appeals to those with DIY sensibilities. Not only can you come up with your own 3D models for printing, but you also likely have to tinker with lots of 3D printer parts for troubleshooting. To take your DIY skills to a higher level, you can also modify or upgrade your 3D printer.
There are literally hundreds of options to modify any single 3D printer. In this article, we will be narrowing it down to just ten ideas that are relatively easy to do but can have a huge impact on your 3D printer’s performance.
1. Belt tensioners
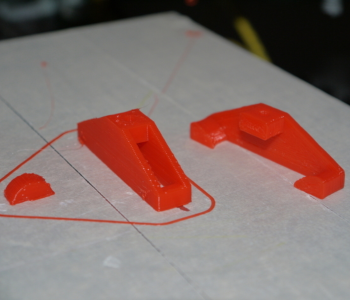
Let’s start with something relatively simple – belt tensioners. 3D printer belts are attached to motor-driven gears. Through this mechanism, stepper motors can control the positioning and movement of the print head or print bed.
Over time, the constant tension and movement can cause the belts to stretch irreversibly. When this happens, the reduced tension on the belt leads to sluggish and inaccurate movement of the 3D printer components. This unavoidable problem can create lots of 3D printing issues if left unfixed.
The best thing about this belt tensioner is that you can 3D print it from this free model. Just clip it on a belt and adjust the tension using a nut and bolt mechanism. This is a great, inexpensive upgrade that can extend the useful life of your 3D printer belts.
2. All-metal hot end
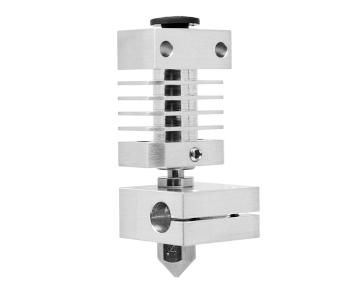
If you want to use 3D printing filaments that print at very high temperatures, then you most likely will need to upgrade your 3D printer with an all-metal hot end. As the name implies, an all-metal hot end does not have plastic parts, more specifically the PTFE tubing found in standard hot ends. The Micro Swiss All Metal Hot End is a popular choice.
This PTFE tubing tends to deteriorate quickly when exposed to temperatures above 240 °C. This becomes problematic if you wish to print with high-temperature filaments like Nylon, Polycarbonate, or PEEK. The PTFE lining can also break down even when printing with PLA or ABS, albeit at a slower rate. This still means that the PTFE lining needs to be replaced periodically.
Switching to an all-metal hot end widens your horizons in terms of the types of filament that you can print with. However, it also introduces new challenges to the equation. You will likely need to print at lower temperatures, disable retraction, and make sure that the heat sink is working optimally. Upgrading to an all-metal hot end can be a bit of a commitment.
3. Magnetic PEI sheet
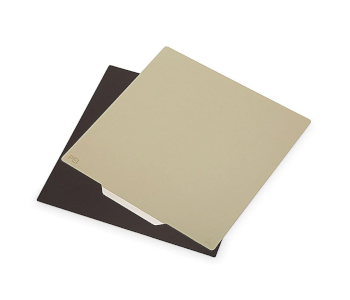
Have you always struggled with removing your finished 3D prints from the print bed? Maybe you have had to pry them off with a metal spatula or place the build plate in the freezer? If you want print removal to be easier, then we highly recommend getting a magnetic PEI sheet.
A magnetic PEI sheet is a flexible steel plate with a magnetic bottom surface that can be mounted or removed easily on a standard build plate. The sheet is meant to be removed after a print and once the build plate has been cooled down. Since the sheet is flexible, the finished 3D print can be popped off with little effort.
The top PEI surface also provides excellent bed adhesion without the need to use glue or tape. This PEI surface performs well even when printing with filaments that are known to be prone to warping. Just be extra careful when cleaning the PEI – it is not meant to be washed with soap, water, or any cleaning solution.
4. Hardened steel nozzle
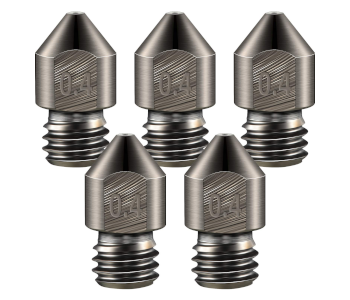
The standard brass nozzles that come with almost all 3D printers are good enough if you’re printing with PLA, ABS, PETG, or TPE. However, there are filaments that are significantly more abrasive. Typical examples are Polycarbonate and any of the composite filaments made by mixing PLA with solid particles like metal, wood, or ceramic.
Using a hardened steel nozzle ensures that the nozzle does not wear out quickly when printing with abrasive filament. A worn-out nozzle has huge effects on print quality because of inconsistent extrusion performance.
Compared to brass nozzles, hardened steel nozzles cost a bit more but can hardly be described as expensive. They also take a bit longer to heat up, so you may want to add a few extra minutes to pre-heating your 3D printer before starting.
5. BLTouch Bed Leveling Sensor
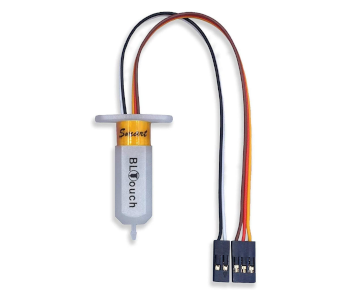
If you’ve been using a 3D printer for a long time, then you probably already know the importance of keeping your print bed leveled at all times. This is easy to do if your 3D printer has an auto bed leveling feature. However, you likely have to do it manually if you own a less expensive 3D printer.
The BLTouch Auto Bed Leveling Sensor can help make this job a lot easier. This sensor goes into the tool head of your 3D printer and can be programmed to run an auto-bed leveling procedure. Just a word of warning – it requires a connection to the board and a change to the firmware of your 3D printer. This is not very difficult for experienced users, but it is definitely not a plug-and-play device.
That said, adding an auto-bed leveling sensor is probably one of the best upgrades you can make to your 3D printer. Automatic bed leveling is not just easier, but it is also more accurate than the manual method. A perfectly leveled bed can greatly enhance the quality of your 3D printed projects.
6. Modified fan duct
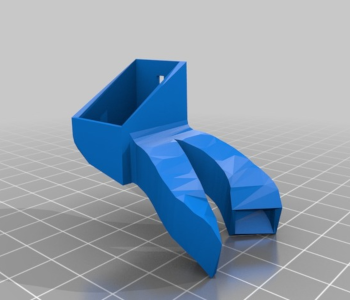
Cooling can be either beneficial or harmful for 3D printing. If you’re printing with a filament that is prone to warping, even the slightest cooling effect can cause the print to be ruined. On the other hand, you can never have too much cooling when you’re printing with flexible filament.
Maximum cooling can cause flexible filament to develop strength and rigidity faster. This prevents common failures such as collapsed or drooping layers that are observed when printing with flexible filament.
This small 3D printable modification can be attached to the hot end to blow cool air directly at the outlet of the nozzle. The model can be freely downloaded. You can also try this alternative that is a bit simpler to build. Either way, the fan duct is designed to speed up cooling. Keep in mind that rapid cooling can also compromise bed adhesion for other filament types.
7. Spool holders
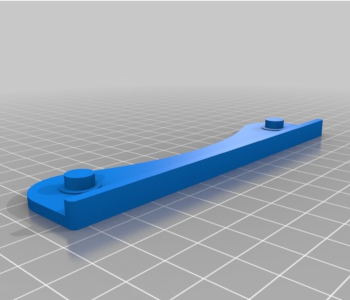
A spool holder may seem like such a simple add-on to your 3D printer, but it is actually a critical part. A good spool holder should be able to freely rotate with minimal friction so that the filament can be fed to the extruder with no resistance. Otherwise, excess friction can cause feeding and extrusion problems.
This 3D printable spool holder is designed to hold a filament spool in place while allowing it to rotate freely on a set of metal bearings. With this accessory, you never have to worry about how and where to place your filament spool.
The great thing about printing your own filament spool holders is that you can have any number of these holders ready to use. If you anticipate having to switch filament mid-print, then you can have another spool ready on a separate pair of holders. This is an incredibly easy and inexpensive upgrade to your 3D printer.
8. Stepper motor dampers
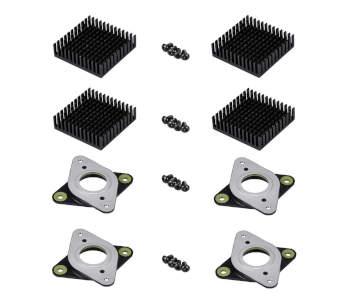
It is a hard truth that 3D printers are very noisy. For this reason, we generally do not recommend placing 3D printers in living rooms, bedrooms, or in any place where people will stay in for long periods. What many don’t realize is that most of this noise does not come from the motors, but from the vibrations of the frame of the 3D printer.
With this idea, this set of vibration dampers sits between the stepper motors and the 3D printer frame. By reducing the vibration of the frame because of the stepper motors, the noise from the 3D printer is reduced by up to 10 dB. Moreover, print quality is also enhanced by the dampening of the vibrations.
The set comes with four vibration dampers one for each of the axes plus an extra one if your Z-axis has two motors. It also comes with heat sinks in case your stepper motors tend to overheat.
9. Remote camera
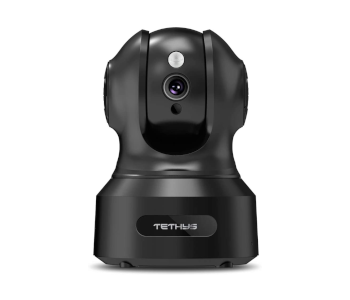
Keeping watch over a 3D printed project is fun for the first few minutes, and then it gets boring quickly. The problem with not keeping an eye on your project is that something can go wrong at any moment, and you might need to step in. If you want to be able to walk away from your 3D printer without worrying too much, then buying a wireless camera might be a great idea.
Any wireless camera that allows for real-time viewing will work here, so there’s really no need to spend too much for something high-end. We recommend this wireless 1080p security camera from TETHYS that costs less than $400.
Just set up the camera facing your 3D printer, connect it to your local Wi-Fi network, and you should be able to keep tabs on your 3D printing job using just your smartphone. With this upgrade, you don’t have to feel like you are chained to your 3D printer for the 12 hours (or more) that it takes to finish a single project.
10. Multi-filament upgrade
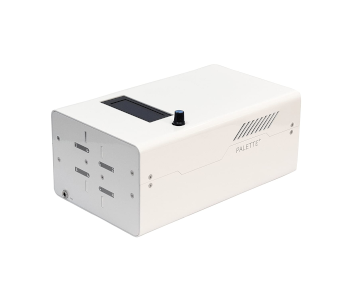
If you own a single-extruder 3D printer, then that means you most likely stick to a single filament for any given 3D printing project. It is entirely possible to swap filaments mid-print, but this requires perfect timing and quick work when it comes time to swap.
The Mosaic Palette Plus is an add-on accessory that makes a 3D printer capable of printing with multiple filaments or colors. It is basically an external filament swapper that can switch between four different filaments without having to modify any hardware on your 3D printer.
With this accessory, you can start printing models in multiple colors. You can also use dissolvable filaments like PVA or HIPS in support structures, making them much easier to remove.
There are two challenges to using this specific accessory. The first is that it’s quite expensive – there are 3D printers that are cheaper than the Mosaic Palette Plus. The second is that the Mosaic Palette Plus is quite a complex piece of equipment. Be ready to spend significant time setting it up before you even print your first multi-colored project.
Final thoughts
3D printers are some of the most versatile machines to have become popular in the last few years. One of the most unique traits of 3D printers is that even inexpensive and basic models can be modified to have more advanced features if you’re willing to do the work.
The upgrades we have listed here barely scratch the surface of all the possibilities of modifying a 3D printer. Have you tried any of these upgrades? What other upgrades are you interested in learning about?

