A Guide to Using Tape in 3D Printing

As advanced as 3D printing technology has become, it’s not beyond simple solutions to its inherent issues. From DIY enclosures to safety pins as nozzle-cleaning implements, everyday items have proven to be valuable in the practice of 3D printing.
One of the more useful tools in the arsenal of a 3D printing professional is adhesive tape. Granted, you can’t use just any tape for 3D printing, but you also don’t need to look beyond your standard hardware aisle. What kind of situation calls for adhesive tape and how should it be used?
Why use tape?
One of the most important steps in 3D printing is making sure that the base layer of the print sticks to the print bed. If you fail at this, you will likely end up with a print that collapses eventually, has corners that curl upward, or layers that shift out of place. Most time, the plastic filament cannot achieve this state of perfection on its own – you will have to help it with some adhesive.
Tape remains one of the more popular options for adhesive aids in print beds. Not everyone likes it – some users swear by it while others will actively avoid using it. This is a matter of personal preference and there is no definitive resolution to this debate.
To help you decide if tape is a good adhesion option for you here are its merits:
Tape is inexpensive
For less than $20, you can buy multiple rolls of tape which should be enough to tide you over for months. Although there are also other cheap options, tape is still a lot less expensive compared to specialty 3D printing surfaces like PEI or BuildTak.
Tape is easy to remove
There are two aspects to bed adhesion – it should help a print stick to the bed but still allow it to be removed with ease once printing has been finished. An adhesive that sticks too well tends to result in damaged prints, or worse, a damaged print bed. When you’re done printing, just peel off the tape from the bed. It’s a no-fuss, foolproof method.
Despite its good points, a lot of 3D printing professionals consider using tape to be more trouble than it’s worth. Compared to other adhesion options, these are some of the “pain points” of using tape:
Difficult to apply
A common alternative to tape is glue stick. Applying glue stick to a print bed is just a matter of swiping the stick several times on the bed, making sure that every centimeter of it is covered. This takes just a few seconds and does not require a lot of skill.
Applying tape is a different matter altogether. Tape has to be applied in side-by-side strips that touch each other but do not overlap. Anything less than a perfect application of tape will result in a bed that is no longer level. If you mess this up, you can end up having even worse bed adhesion problems.
For some people, the value of tape in bed adhesion is not worth the time and effort to apply it perfectly. Compared to any other bed adhesive, tape requires an exacting eye, steady hands, and a LOT of patience.
Creates rough bottom surfaces
If you use a glass print bed, one of the biggest benefits you’ve likely noticed is that prints come out with perfectly smooth bottom surfaces. This is merely an impression of the surface of the glass bed.
Layering tape on top of that glass bed effectively eliminates this advantage. Whether you use painters’ tape or masking tape, the bottom surface of your finished print will take on the fuzziness of the tape. This can be remedied with some sanding and polishing, but it still creates extra work during post-processing.
By providing a surface for the filament to latch onto, tape massively enhances the ability of the filament to stick to the print bed. Tape application is one of the go-to solutions for bed adhesion problems. It’s inexpensive, elegant, and does not rely on fancy 3D printing accessories.
The types of tape used in 3D printing
The first thing you need to know is that you can’t just use any tape you have lying around the house for your 3D printer. More likely, you will have to order some fancy tape from a specialty store. Thankfully, these tapes aren’t exactly rare.
Blue painters’ tape
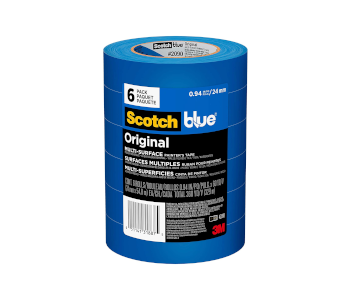
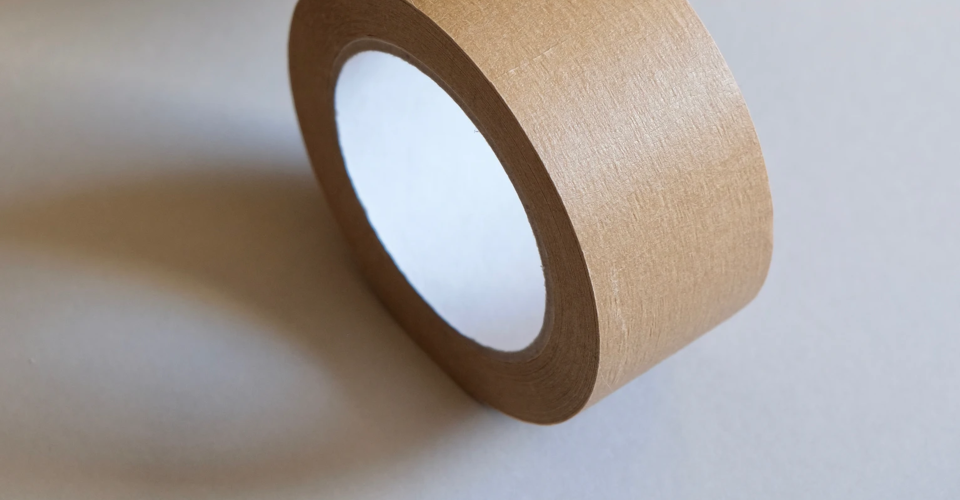
Blue painters’ tape is the classic tape used in 3D printing. Designed specifically to not leave an adhesive residue after removal, this tape is appropriately used mostly when painting walls and furniture. This very same characteristic lends itself well to 3D printing.
Painters’ tape is cheap because it’s basically paper with adhesive. It’s cheap, can be bought anywhere, and is very easy to apply. There are also smoother varieties of standard painters’ tape, which would be ideal for reduced post-processing work.
Ideally, blue painters’ tape should peel off your print bed without leaving residue. The only problem is that painters’ tape is not exactly designed for high-temperature applications. If you’re printing with a heated bed, the heat may end up mobilizing some of the adhesive in the tape and transferring them to the bed.
Another drawback of painter’s tape is that it peels off a bit too easily. Thus, you’re likely to end up with a finished print that has a stubborn layer of painter’s tape at the bottom.
Kapton tape
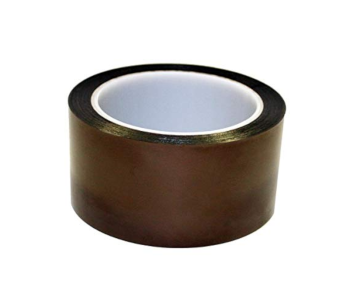
In technical terms, Kapton tape is made of a polyimide material. It is generally used as insulation for electrical wires and circuits. With this in mind, we can expect Kapton tape to better handle heavy-duty situations.
In the field of 3D printing, the main advantage that Kapton tape brings to the table is its heat stability. Standard Kapton tape can withstand temperatures of up to 270 degrees C without its adhesive breaking down. This makes Kapton tape the ideal choice for printing in heated beds.
On the flip side, applying Kapton tape is a lot harder than painters’ tape. Kapton tape has this stubborn consistency that makes it more prone to having trapped bubbles. For this reason, we recommend buying Kapton tape that is as thick as possible. Trust us, this is going to save you a lot of headaches.
Another problem with Kapton tape is that it sticks a little too well to the print bed. Removing the finished print from the print bed is not an issue. However, when the tape gets damaged, it’s very hard for the tape strips to come off cleanly. You’re more likely to end up tearing away at the residual Kapton strips with frustration.
Kapton tape is only a little more expensive than masking tape or blue painters’ tape, so the price isn’t really an issue. You might have problems finding Kapton tape in nearby stores, though, so it’s best to just buy them online.
High-temperature polyester tape
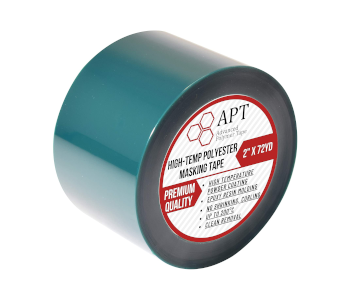
An unconventional choice, high-temperature polyester tape combines the best characteristics of Kapton tape and blue painters’ tape. It’s easy to apply, withstands temperatures of up to 200 C (more than enough for 3D printing), and does not flake off easily upon removal.
Just like Kapton tape, the polyester tape is more commonly used to insulate electrical connections. A suitably high-performance material, polyester tape has excellent tear resistance and has an aggressive adhesive.
The only downside of polyester tape is that it’s significantly more expensive than both blue painters’ tape and Kapton tape. However, a case can be made that the durability of polyester tape makes it the more practical option over the long run. Stronger than Kapton tape, a layer of polyester tape can conceivably be used several more times before it has to be replaced.
Tips on using 3D printing tape
One of the main reasons why a lot of people don’t like using tape on print beds is because of how much work it entails. Let us tell you now that it is hard and that you’re likely to mess up the first few times. Here are some tips to help you get ideal results and lower the learning curve somehow.
1. Take your time
Laying down the tape so that they neither overlap nor have any gaps can be one of the more frustrating parts of using tape for 3D printing. There’s really no secret to this but to take things slowly. With some practice, this whole process should get easier eventually.
2. Tape diagonally
As sticky as tape is, it can still come off from the print bed. This commonly happens when the print warps in the same direction as the tape, effectively pulling it off. To avoid this from happening, it is good practice to lay down the strips of tape diagonally. Start from one corner of the print bed to the opposite corner and lay down the other strips accordingly.
3. Make sure the bed is clean
Oil and dirt are the mortal enemies of any adhesive. Before laying down tape on your print bed, make sure to wipe it down with some water and let it dry. If there’s some leftover adhesive in your bed, you may need to wipe it off with some acetone.
4. Avoid touching the top surface of the tape
Accordingly, leaving any fingerprints on top of the tape will cancel out any of its positive effects on bed adhesion. If you need to wear gloves while laying down the tape, do so. Keep this tip in mind whenever you handle the print bed, especially if you plan on reusing that layer of tape for several projects.
5. Use a scraper to remove bubbles
Ensuring that the layer of tape has no bubbles is one of the more challenging aspects of laying down tape. If you’re doing this for the first time, then it’s worth assuming that it’s unavoidable. In case this happens, make sure to have a scraper on hand.
Run the scraper along each strip of the tape as you lay it down to check if there are any trapped air bubbles. With a bit of force, you should be able to push out the air bubbles. Just don’t be too forceful with it, lest you end up tearing the tape layer you have worked so hard for.
6. Aim for perfection
Getting the layer of tape is hard and takes a lot of practice but getting it right the first time is well worth the effort. Does your tape layer have an air bubble that cannot be removed? Did you end up with several overlapping strips of tape?
It is often better to rip off the erring strips and start over than to push through with a less-than-perfect application. The alternative would be to print with a tape layer that could end up ruining your print – which will have you starting over regardless, only you’ve wasted more time and your 3D printing filament.
Final thoughts
Tape is just one of those household items that are surprisingly useful in 3D printing. More specifically, tape is one of the more effective to one of the most pressing problems in 3D printing – bed adhesion.
To be clear, not everyone who uses 3D printers favors the use of tapes for bed adhesion. They do take a lot of work to use, and there are certainly more convenient options like glue stick or hair spray. However, tape offers enough advantages for it to be worth considering. If you haven’t used tape before, then it would be a great idea to at least give it a try.