How to Make Watertight 3D Prints

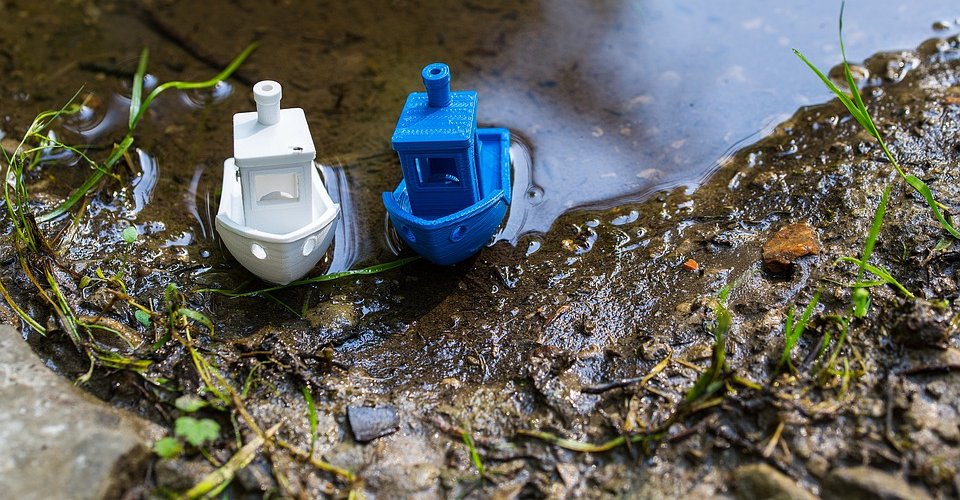
We often see free STL files for 3D printing pots for plants or containers for food and drink. What many of these files fail to mention is that these projects aren’t usable unless they are watertight.
Making a 3D print watertight can take a bit of trial and error. If you want to watertight your project, you will need to establish a few, very specific printing parameters. You can also do some post-processing if you’re not satisfied with the results of the 3D printing. In any case, making a 3D print watertight will require some deliberate and carefully measured actions.
Watertight vs. waterproof
Before discussing any further, we must first define what a watertight object is. This can cause some confusion because more people are familiar with the term ‘waterproof.’ They are two different characteristics, although being watertight and waterproof can be a shared property of many objects.
Being watertight pertains to the ability of an object to hold water or similar liquids without leakage. It has more to do with the construction of an object rather than its material. However, watertight objects are also typically made using waterproof materials. A waterproof material prevents the seepage or absorption of water or similar liquids.
The plastics used in 3D printing already have naturally high waterproofing capabilities. However, there can be different degrees of waterproofing in a material. Water seepage can still happen depending on exposure time, temperature, and pressure. Of particular concern are ‘bioplastics’ that can be broken down by prolonged exposure to water.
To attempt to reconcile the two concepts, a watertight object has to be made from a waterproof material. No amount of sealing of seams can be effective if the material itself cannot keep water out.
Tips on making watertight 3D prints
The reality is that it’s tough to guarantee 100% that the result of a 3D printing process will turn out to be watertight. There are lots of variables to consider and the actual step-by-step process is almost impossible to predict. The strategy here is to take all the measures to make the finished product watertight, even combining them if necessary.
1. Use the right filament
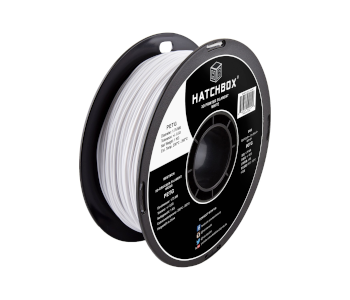
As much as we have downplayed the role of material, it is unquestionably important in making a watertight 3D print. The key here is to use plastics that have traditionally already been used to contain liquids – PETG and Nylon are two very good options.
ABS, although durable and waterproof, may contain toxic compounds that can seep to food or drink. The biodegradable PLA may also be a poor choice because of its tendency to break down upon long-term exposure to biological or chemical compounds. It hardly needs to be said but the water-soluble PVA would be worst choice of material for a watertight project.
2. Use a wider nozzle
A nozzle with a wide opening can create layers that are taller and wider. The idea is to reduce the number of layer lines in the finished 3D print, thus also reducing its “weak points” to being watertight. This necessarily makes a watertight construction suitable only for simple models with basic shapes and no complex details.
3. Over-extrude on purpose
You want your 3D print to have as much as material as possible since it’s the plastic that creates a moisture barrier. This means increasing the extrusion multiplier setting in your slicer. With more filament, you are less likely to end up with gaps where water can seep through. Over-extrusion also helps create thicker layers that will perfectly complement a wide nozzle.
4. Print at high temperatures
If you’re already over-extruding, then there’s a good chance that the filament is already being compressed tightly enough to prevent water seepage. However, that still does not eliminate the chance of water getting into the boundaries between the layers.
Your best bet to address this issue is to improve layer adhesion with higher printing temperatures. If you’re still within the recommended temperature range of your filament, then try to increase the value in 5 °C increments.
Just keep in mind that stringing is also very likely to happen if you’re printing with a wide nozzle. This should not be a huge problem if you stick with simple models that do not have a lot of empty runs.
5. Increase number of shells
Increasing the number of shells simply means building thicker walls on your 3D print with additional layers. This is another brute-force strategy that will hopefully prevent water leakage simply by putting more filament material into the 3D print. Any value from 3 to 5 shells should work fine, especially if you have a wide-diameter nozzle.
6. Apply an epoxy coating
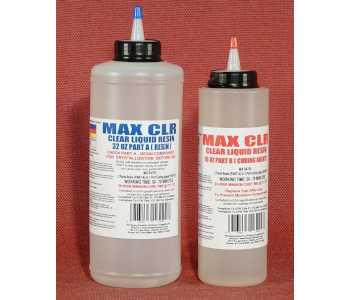
Finally, some post-processing techniques can help to fill in any imperfections in the 3D printing process. After printing, it’s best to some sanding and polishing to make the surface of the 3D print as smooth as possible. This will prime the surface for the application of an epoxy coating.
A two-part epoxy is ideal as a finishing agent for watertight 3D prints. These are just fluid enough to get into any small cracks, gaps, or holes in your 3D print and harden to form a perfectly waterproof rigid layer. This also massively improves the aesthetics of your finished print.
If you intend to use your project to store any food or drink, make sure to use an epoxy resin that is rated safe for food contact.
One thing you may notice in these tips is that they often involve printing with a high volume of materials. Unfortunately, this is the most reliable way to make your prints watertight. If you’re embarking on this project, expect to go through a lot more filament than normal.
The nice thing is that you’re not going to be penalized heavily on printing time if you plan on printing with thick layers and a wide-diameter nozzle. There also isn’t a lot of chances for misprints, unless you’re working with filaments that are prone to warping.
Are 3D printed objects safe for food contact?
Those who are planning to make watertight 3D printed objects typically want to use them as some sort of container for food or drinks. This is perfectly possible if you follow the tips we have listed in this article. However, this begs the question – how safe is it really to store food or drink in a 3D printed container?
The short answer is that it will never be a 3D printed object will never be as safe for food contact as a molded plastic container. One defining characteristic of a 3D printed object is that its surface is never completely smooth. This is a natural consequence of the 3D printing process.
Even with sanding and polishing, there can still be imperfections in the surface of a 3D printed object that may just be too small to be seen by the naked eye. However, these small pockets can still harbor residual food and promote the growth of bacteria.
If you’re going to use a watertight 3D printed project for food storage, make sure to clean it properly every use. Fancy cups and chip bowls are fine, but we do not advise the use of a 3D printed object for long-term food storage.
Final thoughts
Making a watertight 3D print is typically not achieved accidentally. It takes a deliberately chosen set of printing parameters to make sure that a 3D print is as watertight as possible when it’s finished. This often involves the use of as much filament material as possible although you would also want to enhance layer adhesion.
Despite the possibility of creating watertight 3D printed objects, we still advise exercising some caution in using them for food contact. 3D prints are incredibly hard to clean, especially when there is food matter involved. They should be fine as pots and vases for plants.