Best 3D Printer Kits of 2019

It wasn’t so long ago when 3D printers were too costly for Joe Public. The machines and materials were out of reach for many of us but that wasn’t the only problem. 3D printing—especially in its infancy—involved a lot of trial and error. That meant lots of material wastage, tweaking, and repairs. Well… a lot has changed since then.
Today, 3D printing is much cheaper, far easier, and a lot more accurate. Consumer 3D printers can still be costly but not compared those devices of yesteryear. There’s also another approach you may want to consider. This one is even cheaper, heaps of fun, and educational at the same time. That is buying a 3D printer kit, which we explore in this guide.
| Budget |
|---|
 |
| TRONXY® X1 Desktop DIY |
| 4.8/5.0 |
| USB |
| 7.7 lbs |
| Educational desktop printer. Offline USB printing. |
| Check Amazon |
| Best Value |
|---|
 |
| DIY RepRapPrusa I3 |
| 4.7/5.0 |
| ABS & PLA |
| 18.8 lbs |
| Open design and heated bed w/ borosilicate glass. |
| Check Amazon |
| Top Pick |
|---|
 |
| Tevo Little Monster Delta 3D Kit |
| 4.8/5.0 |
| USB |
| 55 lbs |
| Fully automatic calibration and fast printing. |
| Check Amazon |
Building a 3D Printer from Scratch
By ‘building a 3D printer’ I don’t suggest you start at ground zero and etch circuit boards and the like. That approach requires a lot of skill and technical know-how. There’s an easier way to build your own machine and that’s to invest in a 3D printer kit. All you do is follow the assembly instructions and piece the machine together one part at a time.
It’s not difficult to build a 3D printer from scratch as long as you have the desire and patience. If your heart is not in it—and you’re only interested in a kit to save money—then you’ll run into issues. You don’t need to be technical but you do need to be keen. DIY 3D printer kits can be incredibly cheap compared to pre-assembled counterparts.
What DIY 3D Printing Kits Teach
It’s inevitable that you’ll learn about the machine as you assemble it. As you follow the instructions you’ll become familiar with the printer parts, common terms, vocab, and jargon. This basic knowledge stands you in good stead later on when you need to solve problems or carry out basic maintenance.
Basic Skills Needed
The most important thing you need to assemble a 3D printer kit is patience. This is particularly true if you’ve never done anything like it before. Prepare to take your time—and time out—as you progress.
Don’t worry too much. The factory does most of the hard work so your job is to simply assemble their pre-assembled parts. All you do is connect cables and screw parts together as per the instructions. The most basic kits don’t require you to solder or drill anything. It’s impossible to say how long each project takes as that depends on the kit and the ability of the user.
About my Guide
This is not a technical guide so you won’t find any 3D printer assembly tips here. Each machine is different and has its own unique set of instructions. There’s a large online community full of helpful enthusiasts and experts too. The members are happy to help those who struggle. Communities are also great places to swap ideas and share tips for more advanced levels of 3D printer building.
This guide lists 10 great DIY 3D printer kits available right now. I have gone through each model with great care to come up with this shortlist of capable products. I’ve based these models on user reviews, the opinions of industry experts, and my own personal thoughts.
The table below shows these 3D printer kits in the order they appear in the guide. The first three are in order of best budget, best value, and top pick. I’ve ordered the remaining models by price starting with the least expensive first.
10 Best 3D Printer Kits Comparison Table
| Make and Model | Build Time | Build Volume | Price |
|---|---|---|---|
| TRONXY® X1 Desktop DIY 3D Printer Kit | 4-5 hours | 8 x 8 x 7″ | Check Price |
| DIY RepRapPrusa I3 3D Printer Kit | 8+ hours | 8 x 8 x 7″ | Check Price |
| Tevo Little Monster Delta 3D Printer Kit | 2+ hours | 13.3 x 19.6″ | Check Price |
| CoLiDo DIY Printer Kit | 1-hour or less | 7.9 x 7.9 x 6.7″ | Check Price |
| Anet A8 High Precision Desktop 3D Printer Kit | 8+ hours | 8.6 X 8.6 X 9.4″ | Check Price |
| RepRapPrusa I3 V2 Black 3D Printer Kit | 8-10 hours | 8 x 8 x 7″ | Check Price |
| JGAURORAPrusa i3 DIY 3d Printers Kit | 8-10 hours | 7.9 x 7.9 x 7.1″ | Check Price |
| TEVO Tarantula I3 3D Printer Kit | 3+ hours | 7.9 x 7.9 x 7.9″ | Check Price |
| ZONESTARi3 Metal FDM 3D Printer DIY Kit | 8- hours | 8.7 x 8.7 x 9.4″ | Check Price |
| Anycubic® I3 Mega DIY 3D Printer Kit | 4-8 hours | 8.2 x 8.2 x 9.8″ | Check Price |
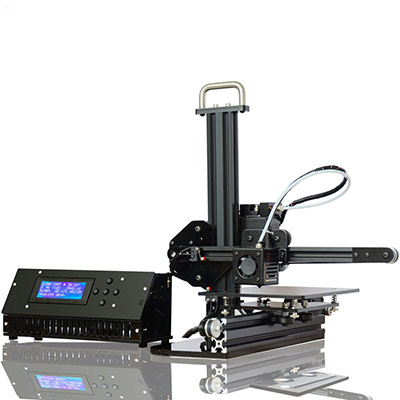
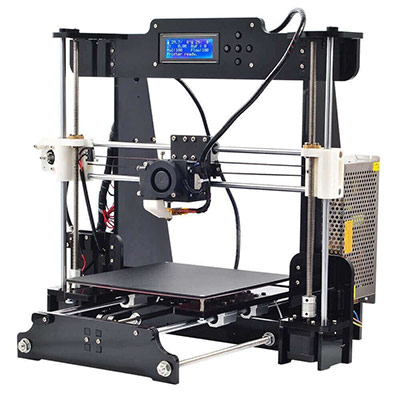
1. TRONXY® X1 Desktop DIY 3D Printer Kit
Editor’s Rating: 4.8/5
The Tronxy X1 is a great little DIY 3D printer for anyone on a budget and who wants a minimalist design. It’s an unusual construction but don’t let that put you off.
This 3D printer kit will please any first time user. It arrives well-organized and is a lot of fun to assemble. It only takes about five hours to put together. New users just need to be patient and follow the manufacturer’s directions by the book. There’s also a great easy-to-follow video tutorial for those who prefer audio-visual guidance.
Using the Tronxy X1 3D Printer
This is one of the best portable educational 3D printer kits around for the money. You’ll learn a lot by the time you’ve assembled it and produced the first test piece. You’ll certainly know more than before you unboxed this budget-friendly machine. There are five simple keys for operating the device using the simple LCD panel. It’s a quiet operator too and prints using all the popular materials.
Another nice touch is the printer’s ability to print offline. A few other highlights include:
There’s plenty to like and lots to learn and it’s all good fun.
The Not So Good
It’s hard to find too much fault considering what you get for the money. The printer’s overall function is average albeit good. That includes printer speed and build quality. There is some wobble on the Z-axis, though, but even that’s solvable with upgrades.

| Tech Specs |
|---|
| Dimensions: 13.39 x 14.37 x 13.78″ |
| Product Weight: 7.7 lbs. (3.5 kg) |
| Build Volume: 5.9 x 5.9 x 5.9″ |
| Filament Diameter: 0.4mm |
| Printable Material: PLA, ABS, HIPS, WOOD, Flexible filaments, carbon, etc. |
| Connectivity: USB |
| Heated bed: No |
| The Pros |
|---|
| Cool simplistic design |
| Educational desktop printer |
| Easy-to-assemble |
| Portable construction |
| USB computer connection, offline USB printing |
| 5 key operation/LCD panel |
| The Cons |
|---|
| Average print speed |
| Average print quality |
| Some Z-Axis wobble |
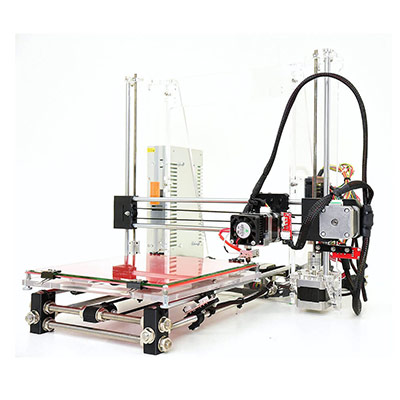
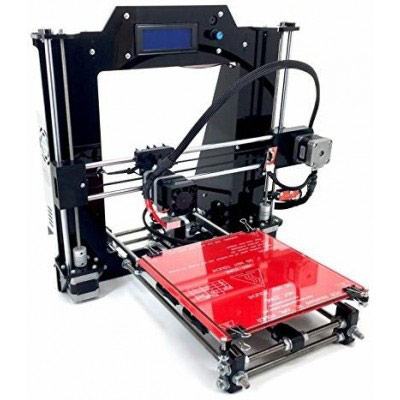
2. DIY RepRap Prusa I3 (Original)
Editor’s Rating: 4.7/5
The original DIY RepRapPrusa I3 is a popular 3D Printer Kit but it’s not ideal for the complete beginner. It takes twice as long as the previous pick to assemble so you have to be patient.
You don’t need to be a tech head to put the Prusa I3 kit together but it helps. Anyone with time and patience will find it a lot of fun to assemble with the right attitude. A 3D printer kit like this one is a great way to get to know the basic workings of these machines. Your newfound knowledge will continue to be useful in the future when it’s time to replace parts and solve problems.
Using the RepRapPrusa I3
If you do run into problems it’s a comfort to know that the excellent after-sales support is US-based. That’s a big deal because a lot of other manufacturers and support departments are in China.
The assembled 3D printer can use ABS and PLA printing materials. Inexperienced users will want to practice with PLA first as it’s much easier to work with. This kit comes with an 8 x 8″ heated bed needed for ABS filament projects. The bed uses borosilicate glass which is more resistant to temperature change so it doesn’t expand like regular glass.
The Not So Good
There are a few disadvantages to the RepRapPrusa I3 but it still sells well and enjoys high ratings. One of the biggest gripes is with the instructions. Some novice users compare them to IKEA furniture kits. Everything you need to know is there, it’s just a bit cack-handed that’s all. Tech-savvy users don’t have any issues but novices may find the learning curve a tad high. There are videos as well.
Another gripe is with the acrylic frame but there’s nothing wrong with it per se. It’s just that it’s not as sturdy as other metallic type frames. A handy LCD display is something else users would have liked to see included with the kit.
The final con is that there’s no auto-leveling. Calibration is vital for smooth printing and it’s another time-consuming learning experience for newbies.
| Tech Specs |
|---|
| Dimensions: 17 x 18 x 15″ |
| Product Weight: 18.8 lbs. (8.5 kg) |
| Build Volume: 8x8x7″ |
| Filament Diameter: 1.75mm |
| Printable Material: ABS & PLA |
| Heated bed: Yes, w/ borosilicate glass |
| The Pros |
|---|
| Open design |
| Heated bed w/ borosilicate glass |
| Prints ABS & PLA |
| User-friendly construction for experienced assemblers |
| Easy to get spare parts |
| US-based technical support |
| The Cons |
|---|
| Not easy for total newbies |
| Acrylic frame |
| No LCD display |
| No auto-leveling |
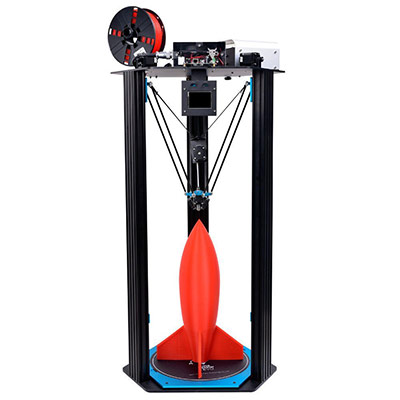
3. Tevo Little Monster Delta 3D Printer Kit
Editor’s Rating: 4.8/5
The Tevo Little Monster Delta is a fantastic 3D printer kit. It has quite a unique look and offers a lot of value for your hard-earned buck.
The first thing to point out with this capable little 3D printer kit is the huge build volume. It has a diameter of 340mm (13.3″) and a height of 500mm (19.6″). It’s a no-brainer for anyone who needs a generous build volume. The simple assembly makes it another attraction for the novice in particular. You can expect an average assembly time of around 6-hours give or take.
Using the Tevo Little Monster Delta
This 3D printer has a modular sturdy structure and comes with plenty of features. It’s not the cheapest kit available but it does offer great value. There’s a handy touchscreen display plus fully-automatic calibration which makes using this machine a cinch. The glass-ceramic heated bed provides fast 2-minute 140 °F heat up times. And the dual stainless steel fans supply effective cooling for 3D parts.
The print quality is nice but it may take a while to perfect the printed parts. Owners also get to enjoy continual support and software updates that are easy to implement.
The Not So Good
There are not any major disadvantages to the Tevo Little Monster. The higher cost will put it out of reach for some home users. Others may not want to invest this much if it’s their first DIY 3D printer kit. Another gripe is that the power cord is pretty short. I’m not sure why this is but it would have made life a little easier if it were longer. And the final—albeit minor complaint—is that it’s quite noisy.
| Tech Specs |
|---|
| Dimensions: 23.62 x 23.62 x 47.24″ |
| Product Weight: 55 lbs. (25 kg) |
| Build Volume: 13.3 x 19.6″ |
| Filament Diameter: 1.75mm |
| Printable Material: ABS, PLA, Flexible PLA, HIPS, nylon, wood |
| Connectivity: USB |
| Heated bed: Glass-ceramic |
| The Pros |
|---|
| 10-step assembly |
| Large build volume |
| Touchscreen display |
| Fully automatic calibration |
| Sturdy frame, modular design |
| Fast printing |
| Great quality prints |
| The Cons |
|---|
| Short power cord |
| Fairly noisy |
| Price tag |
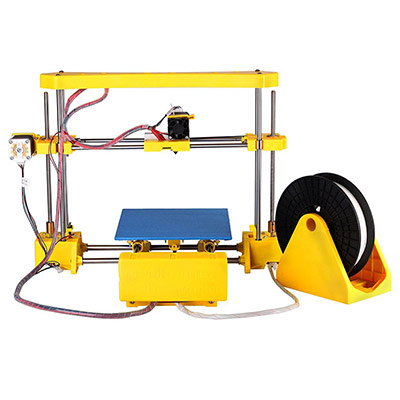
4. CoLiDo DIY Printer Kit
Editor’s Rating: 4.4/5
Next up is the affordable CoLiDo DIY Printer kit which is a great option for the hobbyist. It’s an easy machine to assemble and the 3D printed parts are fairly decent.
This is an ideal 3D printer kit for the entry-level user. It’s a great learning tool to gently ease any newbie into the world of 3D technology. The printer build is solid and uses tough molded plastics, steel rods, and quality brass nuts. There’s a large print bed with plenty of room for those bigger projects.
This is the fastest kit to assemble in the guide. It shouldn’t take more than 45 minutes including calibration. Choose a more complex kit that takes several hours if you want to do lots of tinkering.
Using the CoLiDo DIY Printer
The CoLiDo 3D printer kit comes with a 500g spool of PLA filament to get you started. In the box is a USB flash drive with the software and video tutorial. Once the calibration is set it’s time to do a test print. An adjustable belt drives both the X and Y axis and helps to produce decent quality prints.
The high-quality printer’s extruder comes with a fast release lever for quick filament changes. Overall this is good quality—not exceptional quality—machine. It’s an ideal entry-level product that serves as a great teaching aid. Those who have realistic expectations will be more than happy with what this device offers. It’s small, lightweight, fairly quiet, and free from toxic odors.
The Not So Good
One disadvantage is that it’s a bit on the slow side though not painfully so. There’s no heated bed either which means it can only print with PLA materials. That’s not necessarily a bad thing as ABS is not the material of choice at the entry-level.
| Tech Specs |
|---|
| Dimensions: 22.5 x 11.5 x 11.4″ |
| Product Weight: 18.5 lbs. |
| Build Volume: 7.9 x 7.9 x 6.7″ |
| Filament Diameter: 1.75mm |
| Printable Material: PLA only |
| Connectivity: USB |
| Heated bed: No |
| The Pros |
|---|
| Perfect entry-level educational 3D printer kit |
| Good quality build |
| Large print bed |
| Short assembly time |
| Quality extruder with a quick release lever |
| Upgradable |
| The Cons |
|---|
| Average printed parts |
| No heated bed |
| PLA only |
| Slow-ish |
5. Anet A8 High-Precision Desktop 3D Printer Kit
Editor’s Rating: 4.2/5
The Anet A8 is another affordable 3D printer kit with a fairly large build volume. This one comes with a heated printer bed so it can use more materials than the previous pick.
The previous model only uses PLA. This machine has a heated bed and supports multi-filament use.
Using the Anet A8 High-Precision Desktop 3D Printer
Once you’ve got the printer assembled and running the LCD screen shows the current printing status. The all-metal pulleys are a welcome touch too. These help to improve printing performance and general functionality. Filament feeding is quick and flowing thanks to the fast-release feed gears. You can print using various materials i.e. ABS, PLA, PVA, PP, wood, and luminescent.
The printer’s frame is below average in my opinion but other parts of this kit exceed expectations. The stainless steel rail rods are quality as are the gears, connectors, and bearings. These things combined all contribute toward enhanced printing precision.
Another good thing about the Anet A8 desktop 3D printer kit is that it’s upgradable. Customization is half the fun of 3D printer kits and the best way to learn the ins and outs. There’s everything you need out of the box but you have the opportunity to modify this machine on most levels.
The Not So Good
Don’t buy this kit if you want to be up and running in a couple of hours because it won’t happen. There’s a learning curve here and it takes some tinkering to get things right.
The overall build is average for a machine in its class so it’s not one of the standout features. The acrylic frame is not robust for a start. The good news is that the printer is upgradable and that means you can buy frame supports if you want to.
| Tech Specs |
|---|
| Dimensions: 20.4 x 12.6 x 8.6″ |
| Product Weight: 17.6 lbs. (8 Kg) |
| Build Volume: 8.6 X 8.6 X 9.4″ |
| Filament Diameter: 1.75mm |
| Printable Material: ABS, PVA, PLA, PP, wood, luminescent |
| Connectivity: USB |
| Heated bed: Yes |
| The Pros |
|---|
| Great choice for advanced beginner and above |
| Affordable 3D printer kit |
| Heated printer bed |
| LCD screen |
| All-metal pulleys |
| Quick-release feed gears |
| Multi-filament |
| Upgradable |
| The Cons |
|---|
| Higher learning curve |
| Acrylic frame |
6. RepRapPrusa I3 (V2) Black 3D Printer Kit
Editor’s Rating: 4.4/5
This is the second 3D printer kit from RepRap. This time we take a look at the equally popular Prusa I3 V2. You’ve got US-based tech support and even a hassle-free return policy if you change your mind.
If you’re passionate about assembling electronics then you’re going to love this machine. It’s not a five-minute job and it does take more patience than some of my other picks on this page. The gratification for assembling it and fine-tuning the printing is well worth the effort for enthusiasts.
Using the RepRapPrusa I3 (V2) Black 3D Printer
Teachers who want to introduce 3D printing to a class love this machine as much as DIY enthusiasts. The assembled product performs beyond expectations and prints fairly decent parts. It’s fairly fast for a printer in its class and quiet too. The 8 x 8″ heated build area suits most purposes and the borosilicate glass is a nice touch adding further to the machine’s quality appeal.
The LCD display and SD card reader let operators print without the need to connect to a computer. It’s a versatile product—as well as affordable—and checks plenty of the right boxes.
The Not So Good
Look at the RepRapPrusa I3 V2 for what it is; a versatile learning 3D printer kit with an attractive price tag. It’s great fun but it’s not a serious printer for anyone who needs exceptional quality parts. The 3D printed parts are a good average but they won’t win any awards.
Another gripe is that the video tutorials don’t seem to be in sync with the written instructions. It’s best to stick with one or the other to save any confusion during the assembly process.
| Tech Specs |
|---|
| Dimensions: Not specified |
| Product Weight: 12 lbs. (5.4 kg) |
| Build Volume: 8 x 8 x 7″ |
| Filament Diameter: 1.75mm |
| Printable Material: PLA, BS, dissolvable PVA, conductive PLA, metal composites, and wood |
| Connectivity: SD |
| Heated bed: W/ Borosilicate Glass |
| The Pros |
|---|
| US-based technical support |
| Open-frame design |
| Quieter & faster than RepRapPrusa I3 (previous version) |
| Integrated LCD screen |
| Decent build volume |
| Multi-material support |
| Fully-upgradable |
| The Cons |
|---|
| Average quality 3D parts |
| Video tutorials not aligned with written instructions |
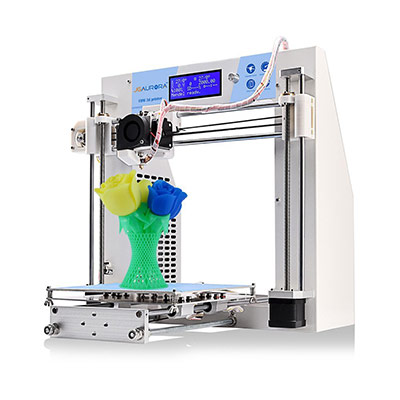
7. JGAURORAPrusa i3 3D Printer Kit A-3
Editor’s Rating: 4.5/5
The JGAURORA 3D Printer kit is an ideal choice for enthusiasts at the entry level. It’s also a good educational machine for students who want to learn about 3D printers and 3D printing technology.
This machine sports metal housing which makes it more stable than the widely-used acrylic frames. It weighs around 21 lbs. so it’s not as light as some 3D printers on this page but it’s still portable. DIY fans love it not just for the quality and ease of use but also for the excellent customer support.
Using the JGAURORAPrusa i3 3D Printer
Using the JGAURORAPrusa i3 is as enjoyable as assembling it. Being easy doesn’t mean fast though. How long it takes depends on the user’s ability level and available free time. You can expect at least eight hours from the unboxing to the first test printout.
The printer has a heated bed and can use various filaments. It also has a reasonably sized printing area. The LCD display allows you to see what’s happening and take full control of the orienting process. Not all 3D printer kits include an LCD display but it’s an invaluable extra.
Being a standalone machine means you can save the Gcode to an SD card and use any computer. The great thing about this kit is the excellent customer support. The response is always fast and helpful whether you experience problems at the assembly stage or with the printing process.
The Not So Good
Some reviewers complain about the long assembly time. For those who enjoy putting machines together, it’s not long enough. It’s not possible to please everyone. If you want something faster then choose a kit that’s quicker and easier to assemble—that’s it.
A few others complain about the vague instructions. I disagree, especially when it comes to the video tutorials. Those who gripe about the instructions tend to be impatient in most cases. And don’t forget the excellent customer support is always there for anyone who struggles.
It would be nice if there was audio on the videos but they still have easy-to-follow captions. A lot of people find the spoken word easier than text but at least it’s possible to freeze (pause) captions.
| Tech Specs |
|---|
| Dimensions: 16.9 x 16.1 x 16.5″ |
| Product Weight: 20.9 lbs. (9.4 kg) |
| Build Volume: 7.9 x 7.9 x 7.1″ |
| Filament Diameter: 1.74mm |
| Printable Material: ABS, PLA,TPU, and WOOD filaments |
| Connectivity: USB |
| Heated bed: Aluminum hotbed |
| The Pros |
|---|
| Solid build, aluminum frame |
| Includes a bunch of spare parts |
| Easy to assemble |
| LCD display screen |
| Heated bed |
| Multi-filament support |
| Great customer support |
| 6-month warranty |
| The Cons |
|---|
| Long assembly time (also a pro with some DIY enthusiasts). |
| No audio on video tutorials (at the time of writing this guide) |
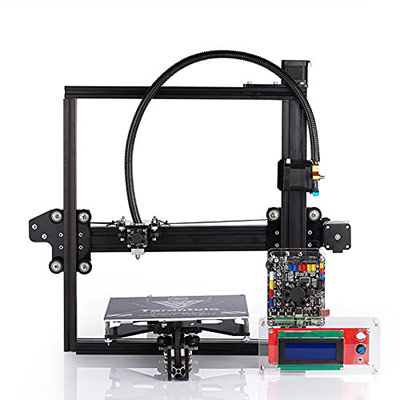
8. TEVO Tarantula I3 3D Printer Kit
Editor’s Rating: 4.6/5
The TEVO Tarantula I3 is a 3D printer kit based on the benchmark RepRapPRUSA I3 3D—only better.
The TEVO Tarantula I3 is not a big seller on internet retail stores like Amazon but don’t let that put you off. This kit sells well in the 3D printing community and offers a lot to DIYers and educators. Seriously, people write about this machine and post help videos all over the internet such is its popularity.
Whether it’s the ideal kit for you depends on whether it offers what you need or expect from a kit.
Using the TEVO Tarantula I3 3D Printer
The assembly is easy once you have the right instructions (see final section). This 3D printer has everything to get started but if you need more there are upgrade options. You can choose automatic bed leveling if you want that and even a larger print bed. The machine supports both ABS and PLA filaments. It’s always wise for less-experienced users to start with PLA though.
The assembled printer is simple in design with a fairly sturdy build. The performance and quality are exactly as you’d expect from a 3D printer in its class. The LCD display puts users in complete control as they go about perfecting 3D printed parts. Most agree that it’s an improvement on the ReprapPrusa i3. It’s also easy to upgrade and customize which makes it especially appealing to DIYers.
The Not So Good
The assembly is easy but the included instructions are not the best. The good news is that there are users who have uploaded YouTube step-by-step videos. These are way better than anything the makers include. The global support community for this product is impressive. Although assembly time is fairly quick it will take a while to tweak this machine to exactly how you want it.
| Tech Specs |
|---|
| Dimensions: 17 x 17 x 16″ |
| Product Weight: 16.5 lbs. (7.5 kg) |
| Build Volume: 7.9 x 7.9 x 7.9″ |
| Filament Diameter: 1.75mm |
| Printable Material: PLA, ABS, Flexible PLA, HIPS, wood, etc. |
| Connectivity: SD |
| Heated bed: Yes |
| The Pros |
|---|
| Highly upgradable and customizable |
| Easy to assemble (harder to tweak) |
| Multi-filament support |
| LCD screen |
| Stable construction |
| Active user community |
| Great after-sales support |
| Price tag |
| The Cons |
|---|
| Instructions incomplete and may confuse novice users |
| Needs patience to perfect printing process and 3D parts |
9. ZONESTAR i3 Metal FDM 3D Printer DIY Kit

Editor’s Rating: 4.3/5
This is a Prusa i3 clone and that’s a good thing. It means there’s a huge online community to support the ZONESTAR i3 Metal FDM 3D Printer DIY Kit.
The metal frame not only makes the ZONESTAR i3 FDM 3D Printer stronger but it looks better too.
Using the ZONESTAR i3 Metal FDM 3D Printer
Assembly of this printer is pretty straightforward but it could take a novice around eight hours. Its auto-leveling function makes adjusting the balance a lot easier. There’s also a Pause & Resume feature that lets users stop and restart printing if necessary. The machine has an LCD display that makes controlling the printing process simpler.
One of the highlights is the dual extruders for dual-color printing. The printer’s general performance is precise and consistent. This is thanks to the quality bearings and stainless steel plate among other things. There’s plenty of opportunity to update and upgrade the machine including a laser engraver.
The Not So Good
The auto-leveling is a welcome feature but some reports suggest the machine can be overly sensitive to leveling. Another gripe is that the extruders can be fiddly to assemble and get working from the outset. The price of this DIY 3D printer kit puts it out of reach for some new users. Although this is true that doesn’t mean it’s not great value—because it is.
| Tech Specs |
|---|
| Dimensions: 18.1 x 16.3 x 15.7″ |
| Product Weight: 18.7 lbs. (8.5 kg) |
| Build Volume: 8.7 x 8.7 x 9.4″ |
| Filament Diameter: 1.75mm |
| Printable Material: ABS, PLA, PVA (includes third-party filaments) |
| Connectivity: SD, USB cable |
| Heated bed: Aluminum bed |
| The Pros |
|---|
| Simple assembly |
| Auto-Leveling feature |
| Pause & Resume function |
| Dual Extruders |
| Metal frame, sturdy build |
| Upgradable laser engraver |
| The Cons |
|---|
| Price tag |
| Sensitive to leveling |
| Extruders hard to assemble |
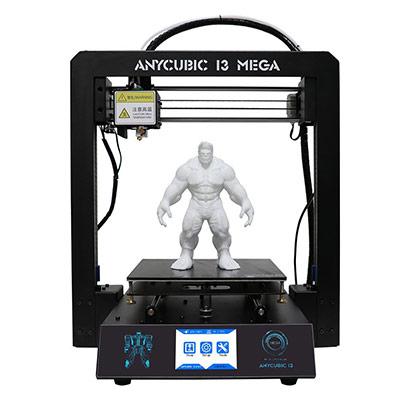
10. Anycubic® I3 Mega DIY 3D Printer Kit
Editor’s Rating: 4.6/5
The great thing about the Anycubic Upgraded DIY Prusa i3 3D is that it’s available in different versions. Whichever one you opt for you’re going to get a customizable machine with a strong build.
What we have here is a re-branded Prusa i3 with a bunch of welcome enhancements. It’s a great choice for beginners and seasoned enthusiasts because of its flexibility in design and usage.
Using the Anycubic® I3 Mega DIY 3D Printer
No one will have any problems putting this kit together with a little patience and persistence. Assembly time takes anywhere between 4-8 hours depending on ability. The 3D printed parts are good quality and display some fine details. The simple LCD touchscreen is a cinch to navigate and lets you take full control of the printer without the need of a computer.
A thick reinforced acrylic frame keeps the machine nice and stable during operation. The quality linear bearings and stepper motors add to the consistent operation and quality parts. There’s also the MK8 nozzle that makes sure printing process remains smooth and accurate.
The aluminum heated bed has a special dual purpose patented Ultrabase coating. One the one hand it provides excellent adhesion for the print project. On the other hand, it allows you to easily remove the printed part without a scraper. It simply snaps off at the base. The printed bed also means more material versatility including PLA, ABS, HIPS and even wood.
The Not So Good
Compared to some 3D printers this one is quite noisy with most of the sound coming from the fans. Another gripe is that the Ultrabase bed doesn’t provide enough ‘stick’ for ASA filament. ASA is similar to ABS. I haven’t tried this but there are enough complaints to make it worth a mention. The price is another disadvantage for some but it still offers excellent value for money with all things considered.
| Tech Specs |
|---|
| Dimensions: 16 x 18.7 x 18″ |
| Product Weight: 17 lbs. (7.8 kg) |
| Build Volume: 8.2 x 8.2 x 9.8″ |
| Filament Diameter: 1.75mm |
| Printable Material: PLA, ABS, HIPS, and wood |
| Connectivity: USB, SD card |
| Heated bed: Aluminum bed |
| The Pros |
|---|
| High-quality build with a thick reinforced acrylic frame |
| Simple assembly |
| Pause &Resume feature |
| Filament sensor |
| Touchscreen LCD display |
| Hotbed w/ Ultrabase coating |
| The Cons |
|---|
| Noisy fans |
| Ultrabase not sticky enough for ASA filament |
| Price tag |
Contents
- Building a 3D Printer from Scratch
- What DIY 3D Printing Kits Teach
- Basic Skills Needed
- About my Guide
- 10 Best 3D Printer Kits Comparison Table
- 1. TRONXY® X1 Desktop DIY 3D Printer Kit
- Using the Tronxy X1 3D Printer
- 2. DIY RepRap Prusa I3 (Original)
- Using the RepRapPrusa I3
- 3. Tevo Little Monster Delta 3D Printer Kit
- Using the Tevo Little Monster Delta
- 4. CoLiDo DIY Printer Kit
- Using the CoLiDo DIY Printer
- 5. Anet A8 High-Precision Desktop 3D Printer Kit
- Using the Anet A8 High-Precision Desktop 3D Printer
- 6. RepRapPrusa I3 (V2) Black 3D Printer Kit
- Using the RepRapPrusa I3 (V2) Black 3D Printer
- 7. JGAURORAPrusa i3 3D Printer Kit A-3
- Using the JGAURORAPrusa i3 3D Printer
- 8. TEVO Tarantula I3 3D Printer Kit
- Using the TEVO Tarantula I3 3D Printer
- 9. ZONESTAR i3 Metal FDM 3D Printer DIY Kit
- Using the ZONESTAR i3 Metal FDM 3D Printer
- 10. Anycubic® I3 Mega DIY 3D Printer Kit
- Using the Anycubic® I3 Mega DIY 3D Printer