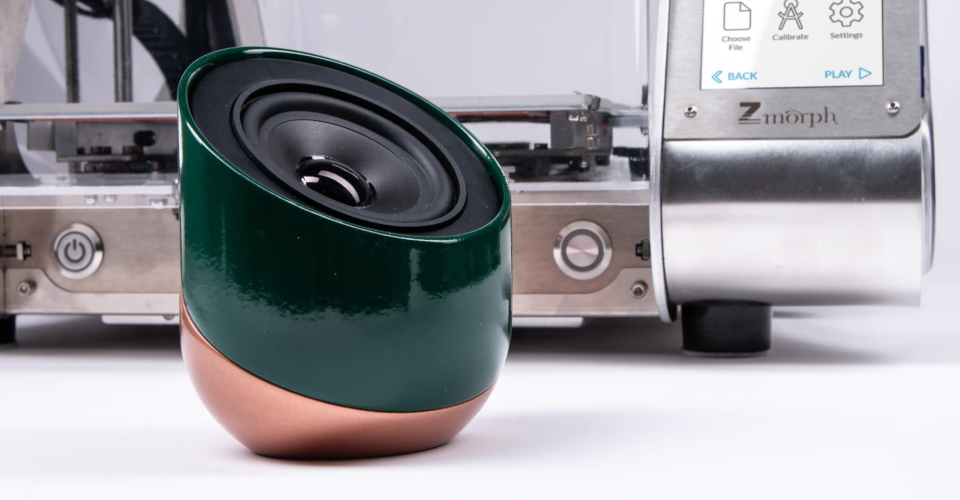
5 Methods to Get A Professional-Grade Finish on FDM 3D Prints

So, you downloaded a 3D model, tweaked it in the slicer software, and waited for hours for it to be 3D printed in an FDM printer. Did it end up looking as good as you imagined? For some 3D printing enthusiasts, this has proven to be one of those initial sobering moments. A finished print fresh from an FDM printer is far from perfect.
For this reason, professionals spend significant time post-processing FDM prints to give them a smooth finish. What are the techniques that professionals use? Check out the list below.
1. Sanding
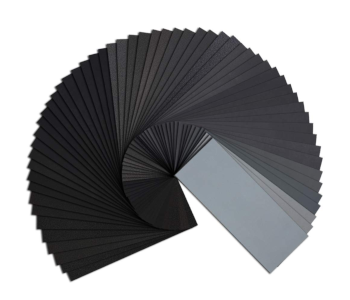
The most common method that professionals use for finishing 3D prints is also something that you can do at home. Sanding merely uses sandpaper to remove the imperfections on the surface of an FDM print, removing any rough features via abrasion.
Sanding is often a multi-step process that involves using sandpaper with different grit numbers, progressing from low-grit to high-grit. The ideal end-result of sanding is an external surface that is smooth both visually and to the touch. This is possible by sanding up to grit numbers of 2000 and above.
The advantage of sanding is that it’s a purely mechanical process that is slow and deliberate. You really have to get to all those small crevices in your print and run them with sandpaper dozens of times. This means that you have better control over how your finished print will look like after post-processing. Of course, the slowness of the process can also be disadvantageous if you’re working on a tight deadline.
Sanding can also be problematic if you’re dealing with parts that are too small and fragile. Finishing via sanding requires a LOT of handling. It can be easy to damage 3D printed parts that aren’t designed to be durable. Moreover, sanding wears down the material on the surface of the part, further weakening it by thinning down the walls.
For this reason, 3D printed parts meant to be sanded during post-processing are designed with extra wall thickness and a mechanically stable infill pattern. Sanding is a cheap and reliable post-processing option that needs to be factored in during the design phase.
2. Polishing
Polishing is a natural follow-up to sanding, and the two often go hand-in-hand. The goal of polishing is to make plastic prints or give them a glass-like sheen. This is one of the best ways of making 3D printed parts simulate the appearance of parts made via other manufacturing methods such as casting or injection molding.
A 3D printed part needs to have undergone thorough sanding before it moves on to polishing. The polishing step starts by applying a polishing compound, typically in liquid form. This compound gets into the small crevices in the surface of the plastic. These crevices are essentially invisible to the naked eye and are a natural limitation of a purely mechanical process like sanding.
Once the polishing compound has been applied in an even manner, the surface is buffed using a cloth or a buffing wheel. This creates the characteristic sheen of polished plastic parts. The results of polishing are often at a level of quality where no further post-processing is necessary.
3. Acetone vapor bath
A special post-processing technique for ABS, an acetone vapor bath takes advantage of the characteristic solubility of ABS in acetone. This technique is one of the easiest methods for post-processing since it’s mostly passive in nature. It does not a lot of skill but needs to be done with a good deal of restraint and an eye for detail.
An acetone vapor bath is done by placing the finished ABS print inside a small chamber with a small amount of acetone. Since acetone naturally vaporizes in room temperature, the chamber fills up with acetone fumes. These fumes come into contact with the surface of the ABS print. This results in a very slow dissolution of the material, thereby creating a very smooth and even surface. When you are satisfied with the results, simply open up the chamber to terminate the process.
When doing an acetone vapor bath, it’s important to open the chamber just a little before the surface of the ABS print reaches your desired state. This is because a very small portion of the acetone remains on the surface of the print, continuing to dissolve it before it completely vaporizes. Leaving an ABS print too long inside the acetone chamber can eventually cause the print to lose structural stability.
One of the best things about finishing via an acetone vapor bath is that it’s a one-step process. When done successfully, the quality of finish with an acetone vapor bath can rival that of the combination of sanding and polishing.
4. Painting

Although some 3D printer models allow for multi-color printing, there may be 3D printed products that still need to undergo painting or dyeing during post-processing. This is usually done for 3D printed consumer products to create variety from the same model.
Before painting can be done, an FDM print must have already been sanded smooth. Recall that sanding is not enough to get a perfectly smooth finish on your 3D print. Painting a surface with imperfections will only result in the paint highlighting those imperfections. For this reason, priming needs to be done first.
A primer compound performs the same purpose of a polishing compound in that it also fills in the small imperfections on the surface of the 3D print. More than just creating a perfectly smooth surface, the primer also enhances surface adhesion when the paint is applied. The selection of the primer compound needs to take into consideration its compatibility with both the plastic used for the 3D print and the paint.
Primer compound is typically applied in multiple coats. Sanding can be done in-between successive layers should there be very visible imperfections. This also creates improve the appearance of the surface, akin to polishing. Applying two or three coats of primer is fairly common.
Once the primer has been set, the paint application can commence. This can be done either by brush or by spray, keeping in mind that maintaining an even application is the priority. Again, the application of multiple coats of paint is fairly normal. A final clear coat can also be added to “seal” in the paint and make it more resilient to damage.
5. Bead blasting
Bead blasting is a far more advanced alternative to sanding which shares the same goal of smoothing the surface of a 3D print via abrasion. Instead of rubbing the 3D print manually by sandpaper, bead blasting uses a high-pressure stream of abrasive material to remove layer lines and any imperfections on the surface of a 3D print. This abrasive material is typically finely ground thermoplastic particles.
In terms of speed and flexibility, bead blasting is clearly superior to sanding. The abrasive material used in bead blasting can get into the very small spaces of a print that would not otherwise accessible by sandpaper. The process is also very fast. Ten minutes of bead blasting can achieve the same level of finish as an hour or two of sanding.
To accommodate less rigid plastic parts, the bead blasting process can be adjusted by lowering the pressure at which the abrasive material is sprayed. Baking soda can also be used as an alternative abrasive material that is less aggressive.
The major drawback of bead blasting is that it requires special equipment, thus making it inaccessible to many hobby-level 3D printing enthusiasts. It also requires much more skill than sanding – it’s easy to see how unskilled bead blasting can ruin a perfectly good 3D print.
Final thoughts
The skill to finish a 3D print to a smooth and polished state is typically the next level of skill that 3D printing professionals unlock once they have gotten the hang of tweaking with their 3D printers. While not technically difficult, post-processing requires considerable practice, patience, dexterity, and an eye for detail.
For professional firms, finishing 3D prints is a non-negotiable part of the process. A lot of their methods are similar to the ones that hobbyists use in their workshops, although done at a much larger scale. Even if you’re just 3D printing at home, there’s nothing stopping you from achieving the same level of quality of finish that these professional firms regularly produce.